Tagged: authorization, license, zaquencer
This topic contains 0 replies, has 1 voice, and was last updated by ![]() Christian 9 years, 10 months ago.
Christian 9 years, 10 months ago.
-
AuthorPosts
-
June 11, 2014 at 10:12 am #124
The Zaquencer firmware is protected by a Challenge-Response System. On the very first startup of the firmware on a BCR2000, a challenge code specific to that device is being shown in the display. This challenge code has to be transmitted to ZAQ Audio (through the “Authorization Form” page – visible after purchase of the license) and will result in a response code being sent back to you. Once you´ve entered the response code your device is authorized and the Zaquencer firmware loads. This BCR will then stay authorized, even when you install Zaquencer updates or put the original Behringer firmware back on. You can turn off the BCR between sending and receiving your code, as this will not affect the authorization procedure.
When starting up the BCR2000 for the first time (and every time until authorized) after installing the Zaquencer firmware, you should see the version number shortly, followed by the letters „Chal“.
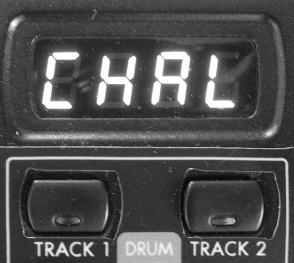
This means that the device is now presenting a challenge code to you. The challenge code is a number consisting of 8 digits (letters/numbers). Push the left lit button under the LCD to show the left half of the number in the LCD and the right lit button under the LCD for the right half of the number.
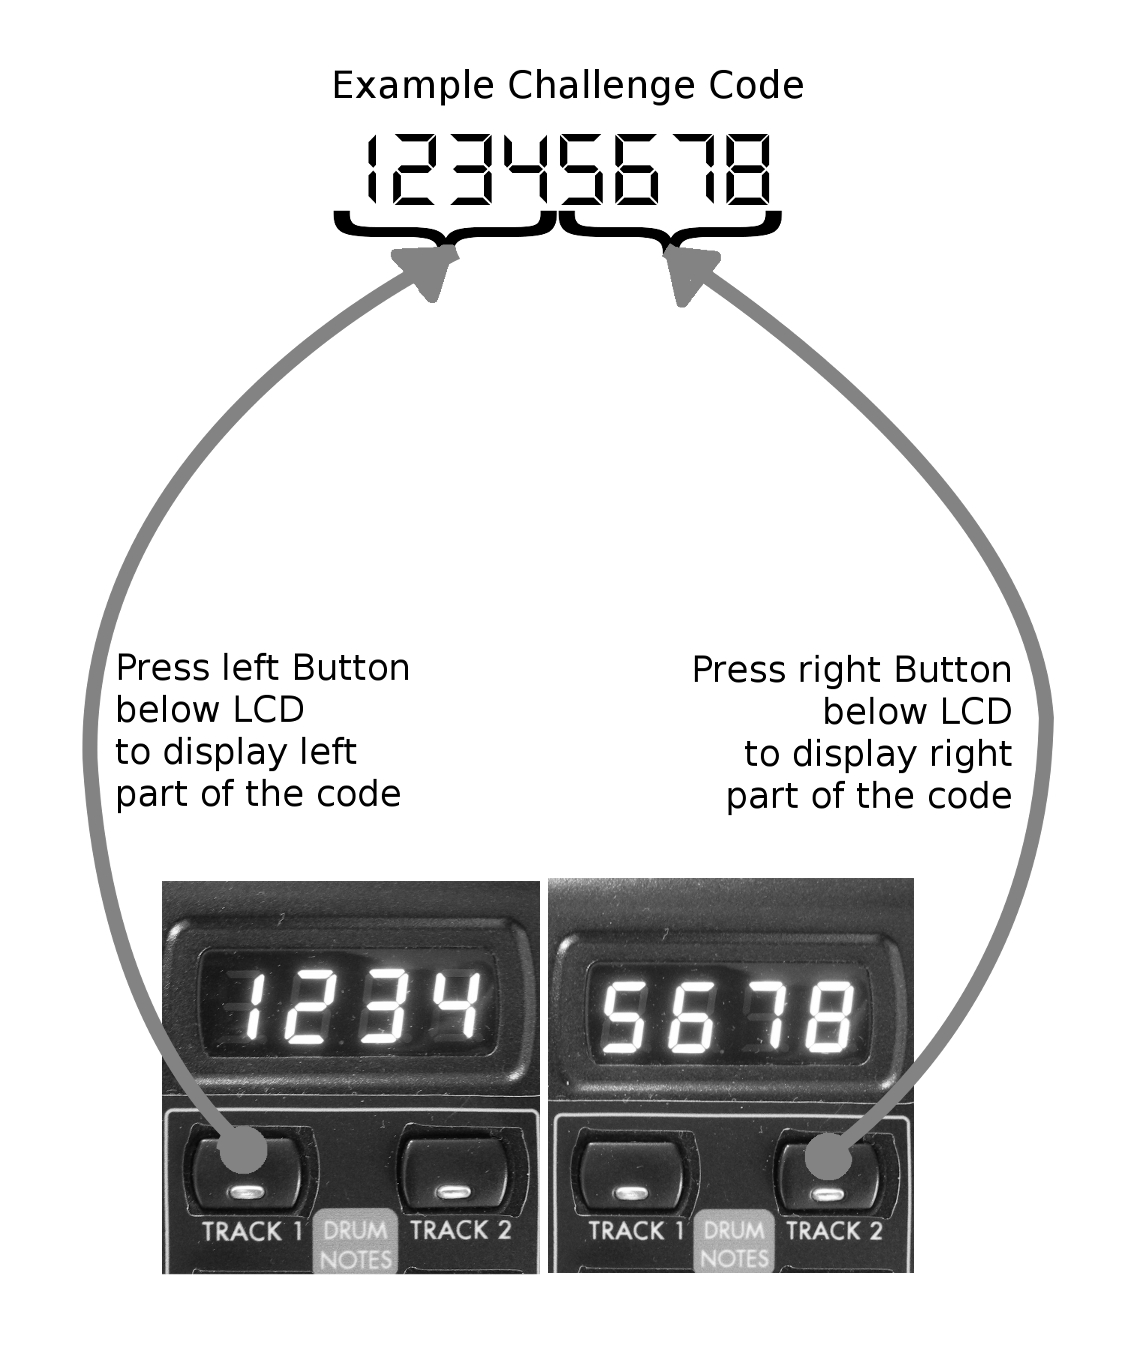
Watch out not to confuse „6“
 with „b“ (small „B“)
  .
.
Press the Exit Button. The LCD displays „Auth“ shortly (Authorization mode) and presents you with 8 glowing top encoders. On each encoder you enter one digit of the response code you´ve received back from ZAQ Audio from left to right.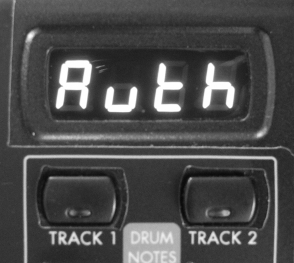
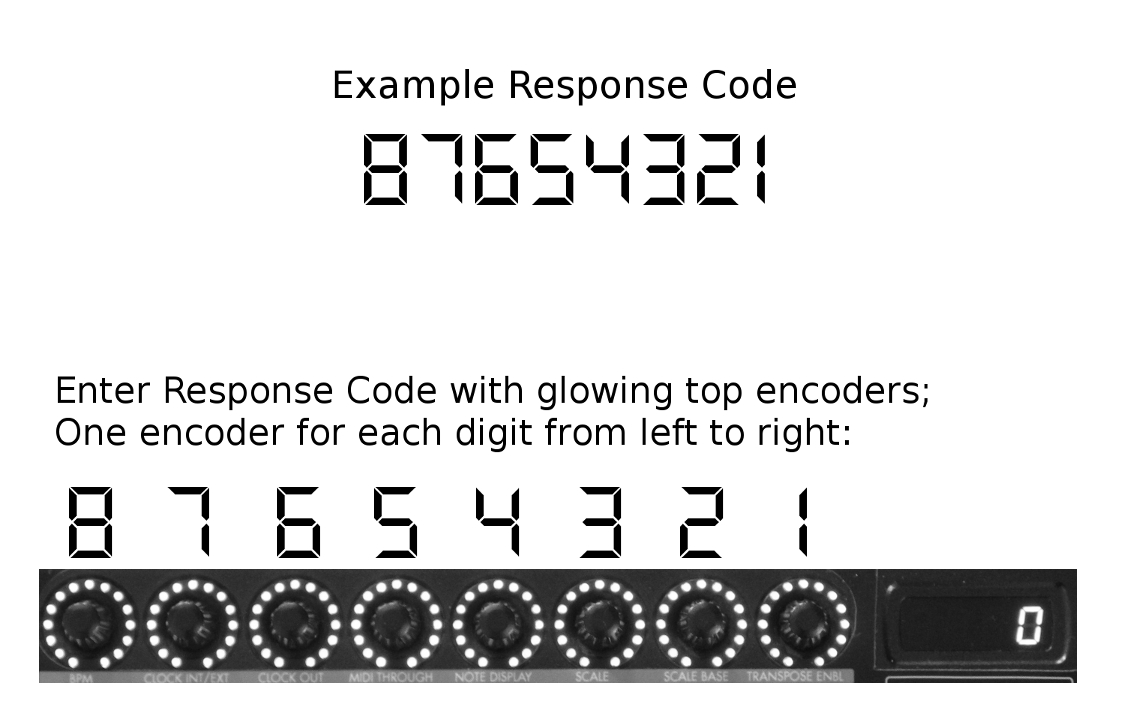
Once all 8 digits have been entered correctly, The device is authorized.
You should see „InIt“ in the display and the LED rings of the first 24 encoders counting up. This may take a while. This formats the internal Flash memory of the device and writes the default pattern to every one of the possible 192 slots.
After that procedure has finished, your BCR is ready to go with the Zaquencer firmware!
Tips:
- you can always reinit all flash memory (global+patterns) by holding Page < (the left Page button) and Stop/Play during turning on the BCR. This will, of course, erase all your musical patterns and global settings
- going back and forth between original BCR and Zaquencer firmware: if preset 1 is written in Behringer firmware, automatic reinit is triggered on next Zaquencer upload; note that if you only write other presets (except nr 1) in the Behringer firmware, and the automatic init is not triggered, you might get garbled pattern info, until you reinit the flash memory like explained here.DO NOT DISCONNECT POWER WHEN WRITING TO FLASH (during init)!!!
-
This topic was modified 9 years, 10 months ago by
 Christian.
-
This topic was modified 9 years, 10 months ago by Christian.
-
This topic was modified 9 years, 10 months ago by Christian.
-
This topic was modified 9 years, 10 months ago by Christian.
-
This topic was modified 9 years, 10 months ago by Christian.
-
This topic was modified 9 years, 10 months ago by Christian.
-
This topic was modified 9 years, 9 months ago by Christian.
-
This topic was modified 9 years, 9 months ago by Christian.
-
This topic was modified 9 years, 10 months ago by
-
AuthorPosts
The topic ‘STICKY: Authorization Instructions’ is closed to new replies.